This article will cover several tips and tricks to improve your portrait photography.
What is Portrait Photography?
From the Mona Lisa to selfies, people have been using portraits to capture the likeness of others for centuries. But what exactly is a portrait? In its simplest form, a portrait is an image that captures the appearance and personality of a subject.
We can use portrait photography for a variety of purposes, including capturing memories, documenting an individual’s life, or immortalizing a moment in time. These days, digital cameras have made it easier than ever to take exceptional portraits. But even with all this technology at our fingertips, taking a stunning picture still requires skill and knowledge.
In this guide, we’ll share tips and techniques to help you take top-tier portraits. Read on if you’re ready to kick-start your photography career!
Best Camera For Portrait Photography
If you want the best results, you’ll need to use a DSLR or mirrorless camera. These types of cameras offer the best image quality and allow you to control all of the settings that affect your photos.
With such equipment, you can adjust the shutter speed, aperture, and ISO to get flawless exposure for your portrait. You can also choose from various lenses to get the perfect focal length for your shot.
If you’re still a beginner photographer, we recommend using a prime lens with a focal length of 50mm or 85mm. The Canon EOS 5D Mark IV is a decent entry-level device, but there are many acceptable cameras out there to choose from. Of course, DSLR cameras can be expensive, so if you’re on a budget, you can still get the desired results with a point-and-shoot camera or your smartphone.
The iPhone 13 Pro is an excellent example of a smartphone that takes impressive portraits. It has three lenses to choose from and comes with Portrait Mode, which uses depth-sensing technology to blur the background and make your subject pop.
Foolproof Portrait Photography Tips
Regardless of your setup, you can do a few things to take better portraits every time. By studying the artform and practicing regularly, you can develop your own style and technique. In the meantime, here are some general tips to help you get started:
Get Close to Your Subject
By definition, a portrait is a close-up image of a person. You don’t want to draw too much attention to the background, so getting close to your subject is key. This will also help you capture more detail in their face.
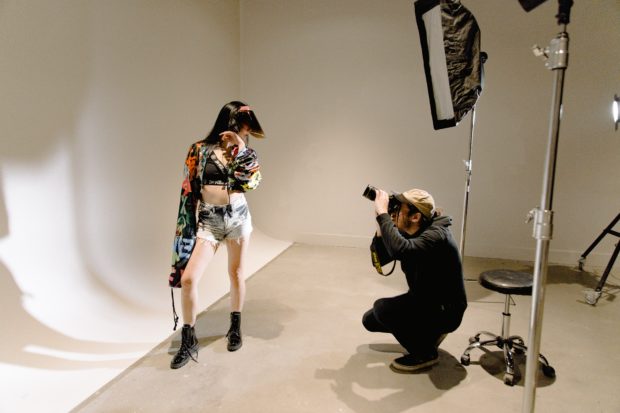
Using a telephoto lens is a great way to get close to your subject without disturbing them. Using a smartphone, you can also use the digital zoom feature to get closer. Just be sure not to use too much zoom, as this will degrade the quality of your image. In this type of photography, the model’s face should be the focal point of the photo.
Use a Shallow Depth of Field
One of the most popular techniques in portrait photography is to use a shallow depth of field. This means that only your subject will be in focus, while the background will be blurred. This creates a more inviting and intimate image that draws attention to the model’s face or the subject.
- How to build a website with WordPress and what are the best plugins to use: WordPress Web Design Tutorials: How to build a website with WordPress and what are the best plugins to use. Building a website with WordPress is an excellent choice due to its versatility, ease of use, and a vast array of plugins that enhance functionality. Here’s a comprehensive guide to building a WordPress website, along with recommendations for the best plugins.
- The Most Important Stages and Plugins for WordPress Website Development: Developing a WordPress website requires careful planning, execution, and optimisation to ensure it is functional, user-friendly, and effective. The process can be broken into key stages, and each stage benefits from specific plugins to enhance functionality and performance. Here’s a detailed guide to the most important stages of WordPress website development and the essential plugins for each stage.
- What are the most powerful Tools for SEO in WordPress?: Powerful SEO Tools for WordPress: Search Engine Optimisation (SEO) is essential for improving your WordPress website’s visibility in search engines. Here are the most powerful tools to optimise your site effectively:
- How to add shipping modules in CubeCart: Step 1: Log in to Your CubeCart Admin Panel: Open your web browser and navigate to your CubeCart admin login page. Enter your username and password to log in.
Step 2: Navigate to the Extensions Section: Once logged in, go to the left-hand menu and click on Manage Extensions. From the dropdown, select Extensions.
Step 3: Find Shipping Modules: In the Extensions section, locate the Shipping tab to view available shipping modules. You can browse through the list or use the search function to find a specific module. - Gathering domain and IP information with Whois and Dig: In the digital age, understanding the intricacies of domain and IP information is essential for anyone navigating the online landscape. This article explores two powerful tools—WHOIS and DIG—that help gather valuable insights about websites and their underlying infrastructure. Whether you’re a cybersecurity professional, a web developer, or simply curious about online resources, you will learn how to effectively utilize these tools, interpret their outputs, and apply this knowledge to real-world scenarios.
- What are the best WordPress Security plugins and how to set them up the best way: Read a comprehensive guide on the best WordPress security plugins and how to set them up to ensure optimal protection for your WordPress site.
- Will a headland provide enough shelter?
- Learn How To Purchase Your Own Domain Name with Fastdot.com: Open your web browser and go to Fastdot.com. Navigate to the Domains section, either from the homepage or from the main navigation bar.
Step 2: Search for Your Desired Domain Name: In the domain search bar, type the domain name you want to purchase. Fastdot supports a wide range of domain extensions (TLDs), such as .com, .net, .org, .com.au, and many others. Click the Search Domain button. The system will check the availability of your desired domain name.

You’ll need to use a large aperture setting (a small f-stop number) to achieve this effect. If you’re using a DSLR or mirrorless camera, we recommend using an aperture of f/2.8 or f/4. This will let more light into your camera and make it easier to blur the background.
If you want to take things one step further, you can also use a zoom lens to create an even shallower depth of field. This is often referred to as “bokeh” and can produce some stunning results.
Also, don’t forget that the eyes are the window to the soul. Make sure they’re in focus by using a single-point autofocus mode and lining up the active focus point with the eye.
Use Natural Light
Lighting is everything in photography, and that’s especially true for portraits. The best light for portraits is soft, diffused light—think of a cloudy day or the shade on a bright day. This type of light is more flattering and will help you avoid harsh shadows on your subject’s face.
If you’re shooting indoors, you can create this type of light by placing your subject near a window. Just be sure to turn off any overhead lights, as they will produce unwanted shadows. You can also use a reflector to bounce some light back onto your subject’s face.
When shooting outside, position your subject, so the sun is behind them. Doing so will help to avoid squinting and produce softer, more flattering light.
Pay Attention to the Background
Going back to the Mona Lisa example, one of the things that make her portrait so iconic is the background. The artist Leonardo da Vinci carefully selected each element in the painting to create a specific mood.
In photography, the background is just as important as the foreground. It can help to set the scene and provide context for your image. Avoid cluttering the background, as this will distract from your subject.
Instead, look for a background that is simple and complimentary. A blank wall or an open field are both popular options. You can also get creative with patterns and textures to add some visual interest to your image. Just be sure not to go overboard—less is almost always more in portraiture.
Finally, pay attention to the colors in your background. Colors can significantly impact the overall mood of your image, so choose wisely.
Use a Reflector
A reflector is a simple yet powerful tool every portrait photographer should have in their bag. Reflectors bounce light back onto your subject, which can fill in shadows and create a more even exposure.
Many different types of reflectors are available on the market, but we recommend starting with a 5-in-1 reflector. These reflectors come with five different surfaces—black, white, silver, gold, and translucent—that can be used to create additional effects.
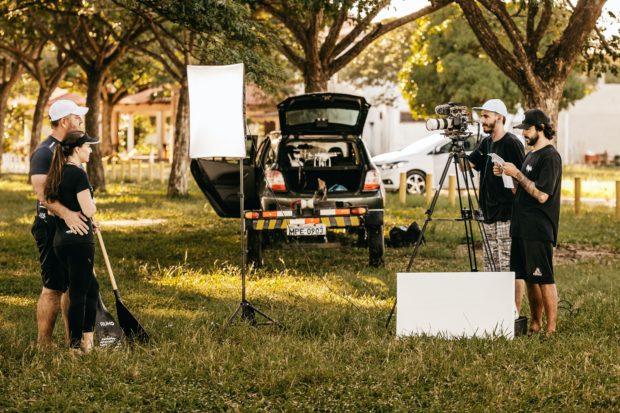
To use a reflector, simply position it opposite your light source. For example, if you’re shooting in the shade, place the reflector to catch the sunlight and reflect it back onto your subject.
Experiment With Different Angles
One of the nice things about portraiture is that there are no rules. You can experiment with different angles, compositions, and perspectives to create unique images. As a photographer, it’s your job to find the best way to capture your subject.
One of the most popular angles for portraits is a 45-degree angle. This can be achieved by standing to the side of your subject and angling your camera so that you’re looking down at them. You can also get low and shoot up at them or climb to a higher vantage point and capture them from a bird’s eye view.
Another popular angle is known as the headshot. As the name suggests, this is a close-up of your subject’s face. Headshots are typically used for business portraits or actor headshots.
Try Black and White
Color isn’t always necessary to create a beautiful portrait. In fact, sometimes black and white can be more effective. When shooting in black and white, pay attention to the tones in your image. Contrast is key, so look for areas of light and dark to create some visual interest.
You can also try different film stocks or digital presets to create different effects. For example, you can use a high-contrast preset to really make the shadows and highlights pop, or go for a more subtle look with a low-contrast preset.
Black and white portraits are timeless and classic, so don’t be afraid to take risks with this medium. Alternatively, you can shoot in color and convert your images to black and white in post-processing.
Use a Flash
Sometimes, no amount of natural light will do. When this happens, it’s time to break out the flash. Flash can be a bit intimidating for beginner photographers, but it doesn’t have to be. Start by reading your camera manual to learn how to use your specific model of flash. Then, test different techniques until you find one that works for you.
One of the most popular ways to use flash is known as fill flash. It involves using your flash to fill in the shadows on your subject’s face. This technique is a good way to add dimension and depth to your portraits.
Another common technique is known as backlighting. This is when you position your subject in front of a light source, such as the sun, and use your flash to illuminate them from behind. It creates a beautiful halo effect that is sure to make your portraits stand out.
There is a fine balance between using too much and too little flash. The key is experimenting and finding what works best for you and your subject.
Get Candid Shots
Most of us have a preconceived notion of what a portrait should look like. It’s usually a formal headshot with the subject staring directly into the camera. But there’s more to portraiture than just formal headshots. Candid shots can be just as beautiful, if not more so.
Candid shots are unposed and natural-looking images that capture your subject in their everyday environment. Ironically, the key to getting unposed shots is to be prepared. While your subject might not seem ready for a photo, you need to have your camera ready to go at a moment’s notice.
Your settings will also play a big role in getting candid shots. For example, consider using continuous shooting mode if you’re shooting with a DSLR. This mode will allow you to take multiple shots in quick succession, increasing your chances of getting that perfect candid shot.
Let Your Subject Be Themselves
A great picture stems from a fluid relationship between the photographer and the subject. If you want your subjects to feel comfortable in front of the camera, it’s essential to let them be themselves. That might mean conversing with them beforehand to get to know them better or simply giving them some space to relax before you start shooting.
Micromanaging your subjects will only make them tense and less likely to give you the shots you’re looking for. Don’t force poses or expressions; let your subjects be themselves, and the rest will fall into place. Instead, trust both of your instincts and let them guide you.
By doing this, you’ll be able to capture your subjects in their natural state, which is what makes for the best portraits.
Use Props Wisely
Props can be an inventive way to add some personality to your portraits. But, as with anything else, it’s important to use them wisely. The objects should represent something about the photoshoot’s theme without being too on-the-nose.
For example, instead of using a literal heart prop for a couples shoot, you could use something that is open to interpretation. A vintage record player or a basket of flowers are both great examples of props that can add some depth to your photos without being too literal.
As with anything else, you shouldn’t go overboard. You don’t want your subject to be lost in a sea of props, so use them sparingly.
Shoot in RAW
RAW is a file format containing all the data your camera captures when you take a photo. This data includes things like exposure, white balance, and sharpness. Shooting in RAW will give you much more flexibility when it comes to editing your photos later on.
RAW pictures also tend to be of a higher quality than JPEGs. This is because JPEGs are compressed files that lose some data in the process. So, if you’re looking to get the best possible shots, shooting in RAW is the way to go.
CreativeLive has a complete tutorial on shooting in RAW if you need some help getting started.
Use Editing Software Wisely
Depending on the look you’re going for, editing your photos can add some extra polish. In most cases, however, keeping the end result natural is always best. There are a ton of different editing software programs out there, so it’s important to find one that works best for you. Some popular options to study include Lightroom and Photoshop.
Avoid filters that drastically alter the look of your photos. Instead, focus on things like color correction and exposure. These subtle changes can make a big difference in the overall quality of your shots.
And finally, don’t be afraid to experiment. Edit one photo in many different ways to see which version you like best. There’s no right or wrong answer to editing, so have fun and see what you can create.
Get Feedback
Your work isn’t finished once the lens cap is back on. In order to really improve your craft, it’s crucial to get feedback from others. Show your photos to friends, family, and fellow photographers. See what they like and what they don’t like.
It’s also a good idea to join online communities and forums dedicated to photography. Flickr is a great platform to start, as there are millions of active users and tons of helpful discussions taking place. Here, you’ll find constructive criticism and learn from fellow industry enthusiasts.
As you get deeper into the world of photography, you might even want to pay for a professional review of your work. No matter how you do it, getting feedback is an essential part of improving your skills as a photographer. So don’t be afraid to put yourself out there and see what people have to say.
Use Leading Lines
Finally, remember to make use of leading lines in your portraits. Leading lines are any line that leads the eye into the photo. They can be things like fences, roads, or even the subject’s own body.
Essentially, leading lines help to create a sense of depth and movement in your photos. You can also use them to draw the viewer’s attention to a specific part of the image. So, if you want to make your portraits pop, don’t forget to use leading lines. To achieve the best results, make sure the lines you’re using are strong and well-defined.
Posing Tips
With all these tips in mind, you’ve got your part of the photoshoot covered. But what about your subject? Here are a few posing tips to help them look their best.
First and foremost, tell them to relax. It sounds obvious, but it’s crucial to success. If your subject is tense, it will show in the photo. So, do whatever you can to help them relax and feel comfortable. This might mean cracking jokes, playing music, or simply chatting with them before the shoot begins.
Next, direct them into a natural-looking position. Have your model stand up straight and avoid crossing their arms or legs. If they’re sitting, tell them to lean forward slightly, so they don’t look slouched.
And finally, don’t forget to capture a variety of different poses. This variety will give you more to work with later and help you create a well-rounded portrait.
Start your Journey Today
Portraits are the ideal photography type to capture the essence of a person. It’s also a lot of fun and can be very rewarding. So, if you’re interested in taking your photography to the next level, consider CreativeLive’s online photography courses. You’ll learn everything you need about people photography, effectively turning yourself into a pro.
In addition, our courses are taught by some of the world’s top photographers. You’ll be learning from the best of the best. But perhaps most importantly, you’ll be able to apply what you’ve learned immediately. So, why wait? Start your photography career today and see where it takes you!

